Table of Contents
Beginners Course using Microsoft Windows 8
ALL THE NOTES BELOW ARE FOR WINDOWS 8. WINDOWS 8 HAS BEEN UPDATED (SUPER-SEEDED) BY WINDOWS 8.1 WHICH HAS BEEN UPDATED TO WINDOWS 8.1 UPDATE. These note are only for Windows 8 and so not applicable to Windows 8.1 or 8.1 Update.
This course is designed for senior people that have absolutely no knowledge of computers, but wish to learn how to use a computer using the windows 8 operating system.
The reason you want to learn to use computers is because you may want to learn to use the Internet, to use email, to write a letter, to save email attachments to your filing system, to download something from the Internet and many other uses.
Todays session, does not cover those things but is purely to walk you through the windows eight interface to enable you to arrive at a position where you can start to learn those things. Those other things are taught in other classes.
A Google Hangout on Air was recorded of me presenting this course and it can be viewed by clicking on this link:
Good Ergonomics - Correct computer posture
Learning to use the mouse
https://www.youtube.com/watch?v=_3s_OYgtl8g
https://www.youtube.com/watch?v=Y2leftW7E_s
https://www.youtube.com/watch?v=8tyVcnAFSI4
Specific Touchpad features for Windows 8 (may not work on all touchpads)
The big picture
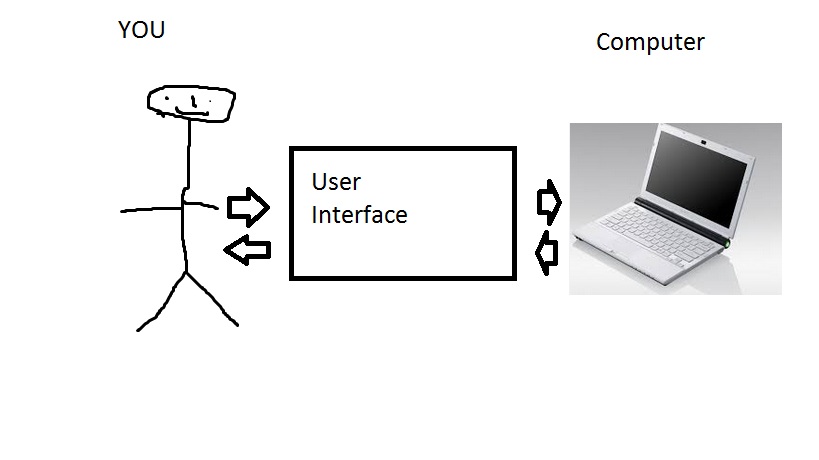
How do you interact with a computer?
Via the user interface part of the operating system
Therefore to use a computer you have to know how to use the user interface
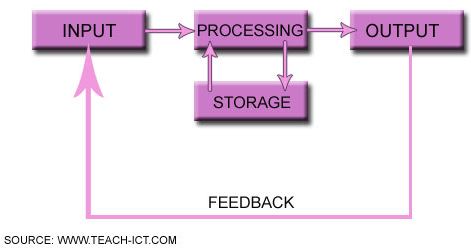
The user interface allows you to control the four things computers do: input, process, storage and output of information
Input devises
Storage devices
Processing devices
Output devices
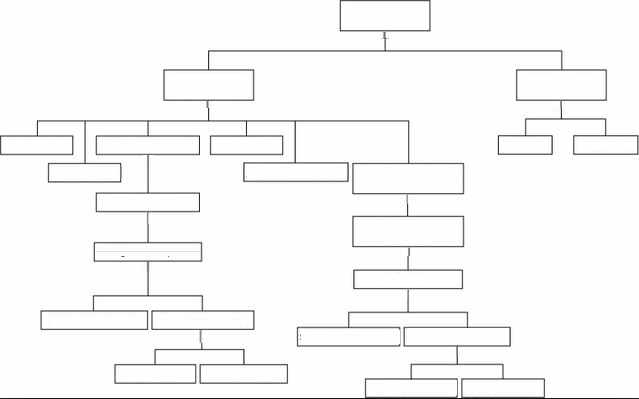
Computers do everything on a hierarchy basis
That is computers do one step, followed by another step, one item below another in the above diagram. Under your control, via the user interface, when you decide which path to take is shown by more than one rectangle coming from an above rectangle in the above diagram.
To get back to where you started, you have to go back through the steps (rectangles).
Often, there can be a quicker way to get back to the point where you started
If you UNDERSTAND how the hierarchy of the user interface works, you will find it easier to learn how to use your computer
Practically all the time in this training session will be showing you how to use, the user interface.
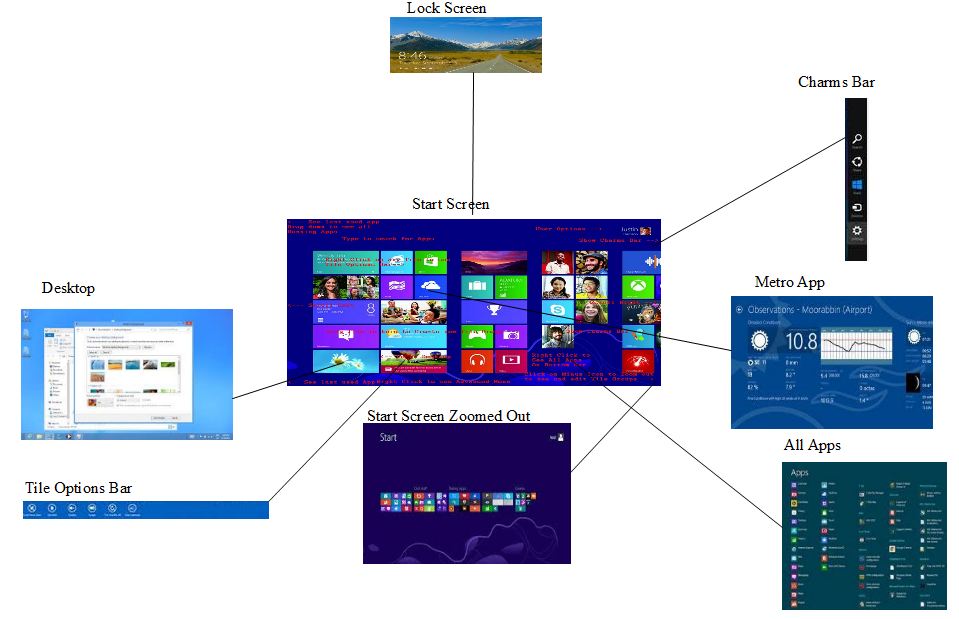
This schematic diagram show some of the hierarchy from the Windows 8 Start screen
Windows 8 diagram re Start Screen
As you learn each step go back to this diagram to see if you now understand that part of the diagram and you know how to get from one part of the diagram to another part and then back to to start screen
What is windows 8
Windows 8 is a version of Microsoft Windows (an operating system developed by Microsoft) for use on personal computers, including home and business desktops, laptops, tablets, and home theater PCs.
http://en.wikipedia.org/wiki/Windows_8
It could be describe as the 8th model of windows.
Here is a video showing the history of Windows from the first version (model) to Windows 8
What is a user interface
As show in the first diagram above , a user interface is the part of the operating system that allows you to interact with your physical computer.
There are many different types of user interfaces, such as character based, graphical user interfaces and touch interfaces. An analogy could be drawn between the different ways of interfacing with a television set. Pressing buttons or using a remote. Or the different way of operating a car. Left or right hand drive. The blinker stalk on the left or right of the steering wheel.
Even within the various types of interfaces the implementation can be achieved multiple ways. For example Ipads have a touch interface but the implementation of it is completely different than in Windows 8 that also has a touch interface.
The Windows 8 interface
Two Interfaces
Before Windows 8, the earlier versions of windows had a graphical user interface operated primarily by a mouse.
Windows 8, whilst maintaining the previous interface, has added an additional interface layer, at the start, called the metro interface, which was primarily designed to be operated via a touch screen. Touch screens are traditionally found on pad computers/devices or smart phones.
This means you may have to learn two interfaces and understand the distinction between the two.
Do you have to learn Both?
Depending upon the type of computer user you are, will depend on whether you wish to learn both interfaces.
If you are only a viewer of information you may be happy to only ever use the metro interface.
If you are both a viewer and creator of information you will most likely need to learn both the metro and desktop interface.
Having had multiple generations of windows, there are far more programs and functionality available for the desktop interface then for the metro interface. So if you only use the metro interface you are missing out on a lot of the richness and functionality of your computer.
Unfortunately, because of the way Microsoft (the company that created and sells windows) have organized windows 8, it is not possible to use the desktop interface without also using the metro interface.
The difference between the two interfaces
The major part of the interface, prior to windows 8 is called the desktop.
Practically all programs that were designed prior to windows 8 will only operate in the desktop interface. They will not run in the metro interface
The major part of the interface on windows 8 is the start screen. Programs designed to run in the metro interface will not run in the desktop interface.
The start screen, which we will look at in detail at later on, allows you to start both metro interface (apps) programs and desktop programs. No distinction is shown on the start screen as to whether a programme is an app or a program. The only way to tell if it is an app or a program, a prior to windows eight program or a windows eight metro program, is to view the interface after it is started.
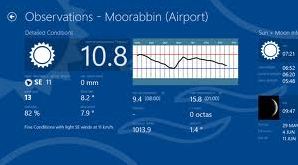
Here is a Metro interface app (The weather app)
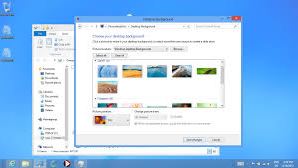
Here is a program in the Windows 8 desktop
Notice the difference between the two interfaces.
For the desktop interface:
- - It has a bar at the bottom of the screen (called the taskbar)
- - It has borders around the the windows
- - There are three icons at the top right of each window
For the metro interface:
- - It has none of the items described in the desktop interface, the app takes up the full screen
Switching on your computer
Switching on most modern computers and involves pressing the on off button. On off buttons look like this:
It should be somewhere on your physical computer/device
The windows 8 lock screen
Depending on how windows 8 is configured, after switching on your computer/device you may be presented with the windows eight lock screen.
This video describes how to use it:
You only have to watch the first 2 od minutes, the rest is him waffling on about nothing
Switching off your computer
This Video explains how to do it:
https://www.youtube.com/watch?v=oLVYRrhmXg0
The steps are:
- - From the start screen move the mouse to the bottom right corner of the screen and the Charms bar should appear
- - Click on settings. The setting information should appear
- - Click on the power icon. A lists of choices should appear.
- - Click on Shutdown
Sleep means that your device is still on but is using a minimal amount of power Shutdown actually does switch computer off so that it will use no power at all Restart will perform the function of switching off the device and starting it again.
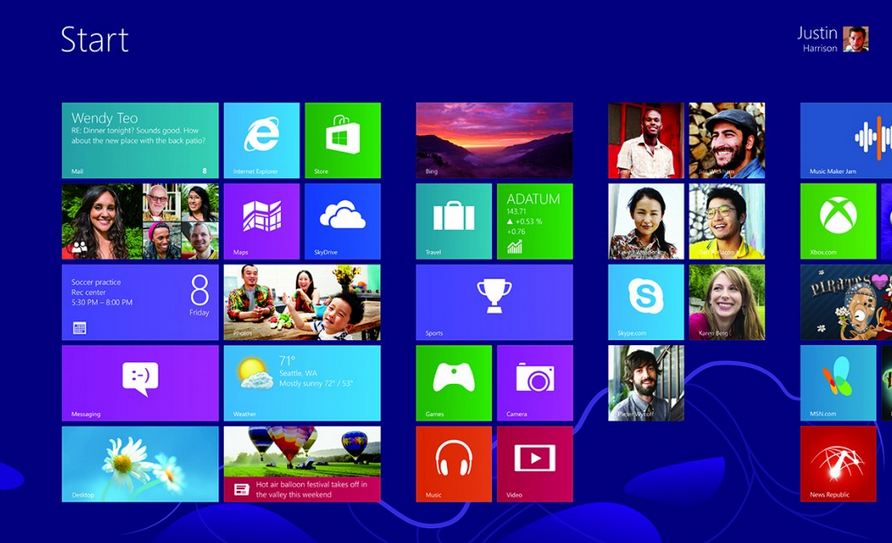
The windows 8 start screen
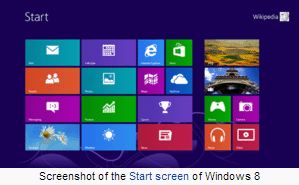
It could like this:
But may look completely different because you can configure it (rearrange it) to appear to suit your requirements and own persona
What you can do from the start Screen
NOTE: Many of the below functions can be performed with the keyboard. See Window 8 keyboard Windows key functions
- - Start an app or a Program. Click on the tile
- - Slide the information right or left to see more tiles. http://youtu.be/wi8NpwiEuzc?t=1m18s Point the mouse at the middle left or right of the screen
- - Go to the Desktop. http://youtu.be/_E1UxI5I_jo?t=1m5s Click on the desktop icon
- - Show Programs that are currently running http://youtu.be/wi8NpwiEuzc?t=54s Point at the upper left corner of the screen or click and drag drown from the upper left hand corner of the screen
- - Go to the lock screen. Click on your name at the top right of the screen
- - See all your programs http://youtu.be/_E1UxI5I_jo?t=3m42s Right click in a blank area then click on the All Apps Icon on the tool bar at the bottom right of the screen
- - Rearrange the tiles http://youtu.be/wi8NpwiEuzc?t=1m41s http://youtu.be/aoSzDTmOlgM?t=4m15s Drag then to a new position
- - Make Tiles Bigger or Smaller http://youtu.be/wi8NpwiEuzc?t=1m38s Right Click on Tile and then click on Smaller or Bigger.
- - Make tiles live or not live http://youtu.be/wi8NpwiEuzc?t=1m33s Right Click on a live tile (one that is moving) and then click on Turn Live Tile Off. Similar way to turn it back on.
- - Delete a tile http://youtu.be/aoSzDTmOlgM?t=4m37s Right Click on the Tile and then click Unpin. It does not delete or uninstall the App but just removes its tile from the start screen
- - Uninstall Apps http://youtu.be/wi8NpwiEuzc?t=1m45s Right Click on tile and then click on Uninstall.
- - Move a tile to a different group of tiles. Drag it to the other group of tiles
- - Name or rename a group tiles http://youtu.be/aoSzDTmOlgM?t=5m15s Zoom out by clicking on the Minus Icon at the bottom right of the screen, Right click the group and click on Name. Enter a name of new name. Click anywhere to unzoom
- - Rearrange groups http://youtu.be/aoSzDTmOlgM?t=6m52s Zoom out by clicking on the Minus Icon at the bottom right of the screen, Drag the group to where you want it. Click anywhere to unzoom
- - Create a new tile group. Drag any existing tile to the blank area between groups
- - Call up the Charm Bar http://youtu.be/_E1UxI5I_jo?t=7m48s Move the pointer to the top or bottom right of the screen
- - Putting a desktop application on the Start screen http://youtu.be/_E1UxI5I_jo?t=5m From All Apps right click on a program and click on Pin to Start. It will be added to the right most part of the start screen (you may have to scroll to see it)
- - Uninstall a Desktop Application http://youtu.be/_E1UxI5I_jo?t=6m9s From All Apps click on the program and then click on Uninstall.
- - Call up advanced Menu Point at the bottom left of the screen until the Start Icon appears and then right click
- - Call up the Charms Bar Point mouse at the right of the screen
- - Change the background image https://www.youtube.com/watch?v=gedIiuKzgY4 Charms/Settings/Personalize/Backgrounds
- - Typing a program name or part of it will display that Program http://youtu.be/aoSzDTmOlgM?t=18m21s Just type when on the Start Screen
From within a Windows 8 Metro App
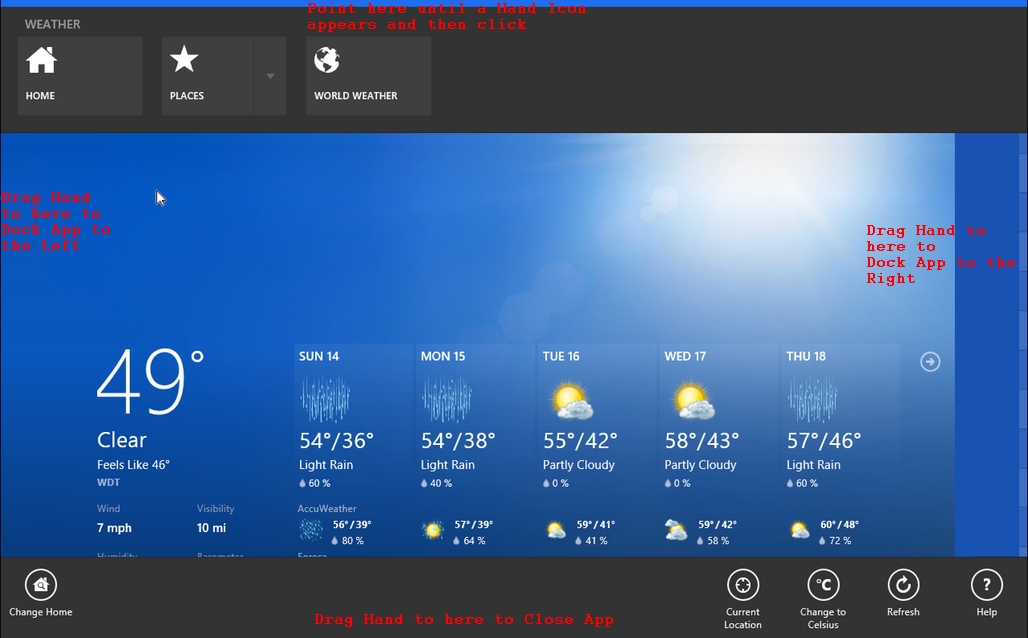
- - Closing a Windows 8 Metro App http://youtu.be/_E1UxI5I_jo?t=1m45s Point to the top of the centre screen until it changes to a hand and then click and drag to the bottom of the screen
- - Having 2 Windows 8 Metro Apps open at the same time http://youtu.be/_E1UxI5I_jo?t=2m17s With the App open point to the top of the centre screen until it changes to a hand and then click and drag to the mid left or right of the screen and then release the mouse button. Clicking on the blank area will take you back to the start screen. A subsequent started App will open in the blank area.
- - When two Apps on the screen adjusting which is the biggest http://youtu.be/_E1UxI5I_jo?t=3m Double click on bar between the Apps
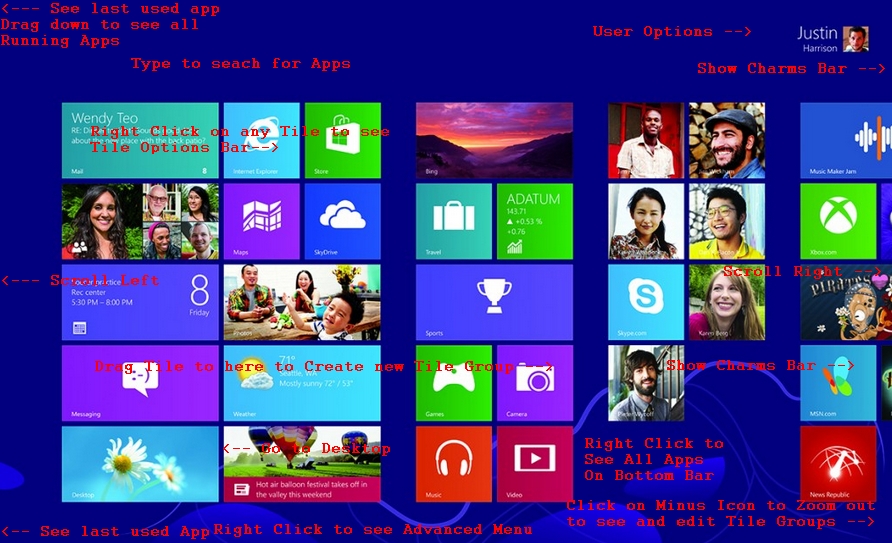
The RED text shows the Zones and the functions they perform.
Windows 8 Charms Bar
The functions it performs: http://youtu.be/_E1UxI5I_jo?t=8m34s
- - Search: for Apps and Programs, for setting, for files and within individual Apps.
- - Share: Via Email, Facebook, Twitter or whatever other Apps you have installed the information you are currently viewing. ie you have to be viewing information eg, Photos before you can share it.
- - Start: Opens the Windows 8 start screen.
- - Devices: Shows other devices attached to your device such as digital cameras, pad computers and the like.
- - Settings: Allows you to change the setting for your device
Settings
The setting screen, Accessed via the Charms Bar allows you to change the setting for your device.
http://youtu.be/_E1UxI5I_jo?t=9m54s
- - Desktop: Takes you to the desktop if you are not already on it
- - Control Panel: Opens a screen that allows you to adjust various parts of you device such at the mouse and keyboard
- - Personalization: Opens a Personalization screen that allows you to set item to meet your personal requirements such as the Desktop Background, Screensavers Colours and sounds.
- - PC Info: Opens a screen that give you information about your device such as the The version of Windows 8 you are using, a rating of your devices performance, the name give to your device and the Windows Product ID Code.
- - Help: Opens the windows Help and Support screen that allows you to search for help on any windows topic. Typically help has not tended to be very helpful and considering it is accessed via the Charms Bar which itself is hidden makes help even less useful.
- - Network: Allows you to adjust network settings
- - Volume (A Speaker icon) allows the adjustment of the sounds coming from from your device's speaker(s)
- - Brightness (A Sun icon) allows you to adjust the brightness of your display screen
- - Notifications: Allows you to set how you are notified when certain events occur such as receiving Email or and pre-set event time arrives
- - Power: Allows you to shut down, switch off, your device.
- - Keyboard: Allows you to make changes to the way your use your keyboard.
Zones
Areas on the screen that you point to or click on to perform the described functions
By just looking at the screen there is no indication that these zones exist. You just have to remember that they exist or refer here to know they exist
http://youtu.be/aoSzDTmOlgM?t=8m23s
- Upper Left: Last Used Applications
- Bottom Left: Last used App when in Start Screen otherwise takes you to the Start Screen
- Top Left Drag Down: All running Applications
- Top Right: Charms Bar
- Bottom Right Charms Bar
- Middle Right Scroll right
- Middle Left Scroll Left
The RED text describes what using the mouse in that zone can do
Keyboard Windows key Functions
http://youtu.be/wi8NpwiEuzc?t=2m52s
- Win Key: Go to the Start Screen
- Win Key + D: Go to the Desktop
- Win Key + E: Go to File Explorer
- Win Key + R: To Run a Program
- Win Key + X: To Bring up the Advanced Menu
- Win Key + F: To go to Files
- Win Key + W: To search Control Panel
- Win Key + C: To display the Charm Bar
- Win Key + M minimises everything that's showing on the desktop.
- Win Key + Tab opens a list of currently running programs.
- Win Key + Print Screen takes a screenshot and saves it in a Screenshots folder nested in your Pictures folder.
To take a screenshot on a Windows 8 tablet, simultaneously press the Windows button and the volume-down button on the tablet chassis.
- Win Key + Q opens a global search menu. Type what you're looking for and where you would like to look.
- Win Key + W opens a search in your system settings to quickly locate and change system properties.
- Win Key + Pause opens the system properties page to show you a quick rundown of your specs.
- Win Key + “,” (that's the comma sign!) makes all current windows transparent, giving you a peek at the desktop as long as you hold down (Windows).
- Win Key + “.” (the period) snaps a window to the right or left side (toggling each time you press “.”).
- Win Key + X opens the Quick Access Menu, exposing system functionality such as the Command Prompt, Disk Management, File Explorer, Run, and more. It's perfect for people who Start Menu. Alternately, you can right-click on the bottom right corner of the screen to spawn the Quick Access Menu.
- Win Key + I opens the settings menu, giving you quick access to the Control Panel, Personalisation, and your Power button, among other features.
- Win Key + O locks orientation on devices with an accelerometer.
- Win Key + Page Up Move Start screen and app to monitor on right (If you have more than one monitor)
- Win Key + Page Down Move Start screen and app to monitor on left (If you have more than one monitor)
Windows 8.1
How to copy any part of this page to another program (like Notepad)
Here is a video showing how it is done. (But it is using Windows 7) http://www.youtube.com/watch?v=oYsoZ1gPJTA
This assumes you are using the Desktop version of the program to show this page.
- - Place the mouse pointer at the beginning of the text you wish to copy
- - Whilst holding down the left mouse button drag the mouse over the part of the text you wish to copy
- - You can drag in any direction. Left to right, right to left, top to bottom or bottom to top
- - As you do the above step the text that you are selecting will be highlighted
- - When you are finished selecting the text release the left mouse button
- - Point to the selected text again and press the right mouse button
- - Point at the Copy option and left click.
- - You have now indicated what you want to copy and it and is store is what is called the clipboard. You can not paste it into most other programs
- - You might want to note the remaining steps as when you do the next step this you will no longer see this page.
- - Go to the Start screen, you can go so by pressing the Windows Key
- - Start a program you want to paste into such as Notepad. ie Click on the Notepad tile or type Notepad
- - When in Notepad right click and on any blank area in the Notepad window and a list of options will come up. left Click on the Paste one
- - The text you selected above should appear in notepad
- - If you want to save what is now in Notepad. Click on File and the Save, Enter a name and then click on the save button

